
Outside of a golden brown turkey with all the trimmings, there are few things so iconic of Thanksgiving as a cornucopia. And what is better than a horn full of flowers and greenery?!
Below, I’ll show you how to replicate a perfect cornucopia with sola wood flowers. This will make for a perfect colorful centerpiece for your Thanksgiving table.
What You'll Need:

Here is what I used for this project:
- Cornucopia (I found this one at Goodwill!)
- Sola wood flowers from Oh You're Lovely (spider mum, latte, american beauty, honey bee)
- Foam pumpkins
- Greenery (smilax, cream seeded Italian ruscus, fall mixed greenery)
Add Foam!

Cut down a piece of foam and add it in the center of your cornucopia! For this piece, I did not glue the foam on (because I love changing out my decor every year) but you absolutely can if you want the arrangement to be permanent.
Start Adding Greenery!

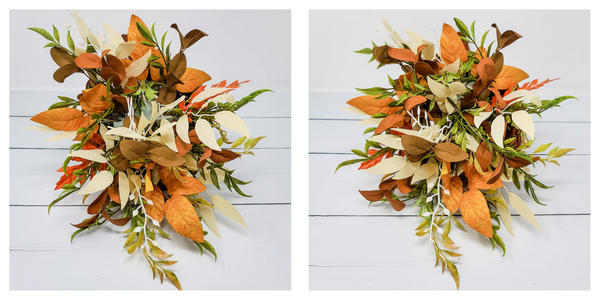
Top left and right pictures - start with the smilax. There is a decent amount of hang to this type of greenery which means you want to add it first as it has the most natural movement to it. When adding the smilax, remember you are basically setting the boundaries for your arrangement and these will be the most extended greenery pieces.
Bottom left and right pictures - add in your cream seeded Italian ruscus. You will want to cut it down in several places to ensure the pieces are shorter than the smilax.
Separate Your Mixed Filler Stems!


What I love most about mixed greenery/filler bundles is that you get so many different leaf shapes, colors and textures! For this project, you do want to separate them all out so you can add them by type/color.
Add Leafy Pieces!

Starting with your leafy fillers, begin to add them to your cornucopia. You want to make sure the piece is balanced and the best way to do this is to add one type at a time!
Cover the Center Foam!
In the center of the left picture, you can see that there is a section of foam visible. To help cover that up, I added some more smilax and leafy greens from the fall mixed greenery.
Add Textured Pieces!

Once the greenery/filler base is full and lush, it is time to add in your textured pieces! At this point in the arrangement, focus on the outer boundaries of your piece. When the flowers are added, you don't want to lose any of those smaller filler bits!
Stem Your Flowers and Pumpkins!

Pop a dab of hot glue on the back of your flower (or pumpkin) and add an 18 or 20 gauge wire stem to it.
Start Adding Flowers!

Left picture - my largest flowers were my spider mums so I started by adding those and creating a triangle in the piece with them.
Right picture - next I added in the yellow latte flowers.
Add Pumpkins and More Texture!

Similar to how I added in the beginning flowers (in a triangle formation), I added in our pumpkins. Once those were in, I noticed that there were some holes in our greenery base that could use additional texture (ie - the small orange berries from the fall mixed greenery) so I popped those in!
Add the Final Flowers!

Our final flowers were the honey bees (left picture) and american beauties (right picture). Again, for balance you just want to have them evenly distributed throughout the piece and that can most easily be done with a triangle!
The Finished Cornucopia!

And there you have it! With this cornucopia on your table, you’ll be bringing in all the rich colors of fall with the bonus of having created this special arrangement on your own. Happy Thanksgiving!
© 2026 Oh! You're Lovely - Sola Wood Flowers, All rights reserved. |
