
Flower crowns are the perfect accessory for so many events! Birthdays, weddings, a random Tuesday...any time you want to feel extra special add a flower crown!
What You'll Need:

Here is what I used for this project:
- Paper wrapped stem wire or pipe cleaners
- Twine
- Ribbon
- Greenery from Oh You're Lovely
- Sola wood flowers from Oh You're Lovely
Fold and Wrap the Wire!
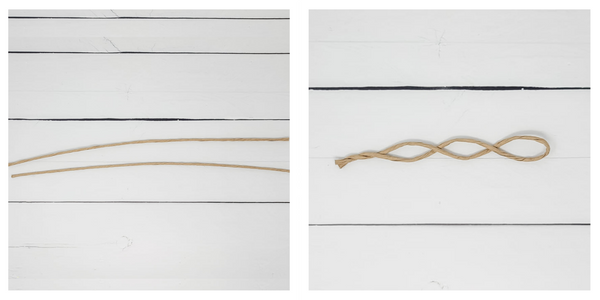
To start your floral crown, you will need two paper wrapped stem wires or pipe cleaners. Fold one in half first and then wrap them to create three loops. Twist off the end to secure and tighten the ends.
Weave the Two Wires Together!
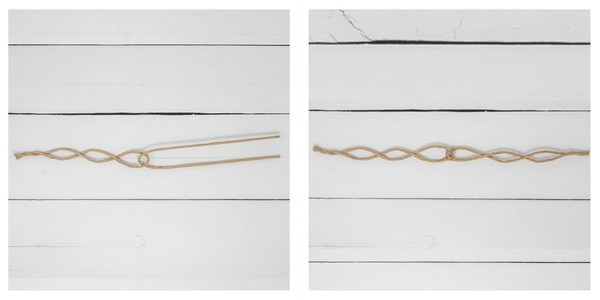
Grab the second paper wrapped stem (or pipe cleaner) and hook it through the end loop of your first stem. Repeat the wrapping on the second stem until the two sides match. Once you have that complete, hot glue the center point (where the two stems connect) on both sides to ensure it holds in place.
Add Ribbon!
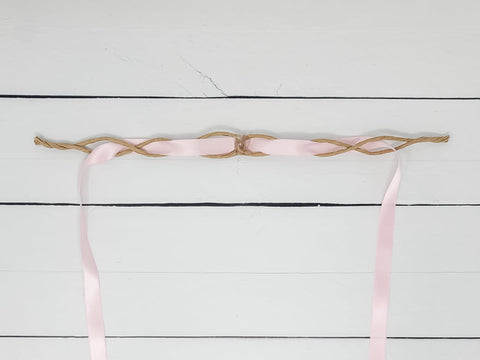
Once the hot glue has dried, weave ribbon through the loops. I generally start the weave behind the hot glued center. That way, the hot glue doesn't come into contact with the skin of the person wearing the floral crown.
Secure Ribbon!

In the picture to the left, you can see that the ribbon is not connected to the ends of the paper wrapped wire. To secure the ribbon to the ends of the wire (and to ensure no wire ends can poke the floral crown wearer), hot glue the loose ribbon onto the wire. To add a second layer of protection and a second ribbon for extra flow, glue and wrap a second ribbon around the twisted bottom of the wire stem.
Use Twine to Attach Base Greenery!

To attach the base greenery, cut three pieces of twine. Start with the sides of the crown and the flattest, largest leaf greenery you have available. In this case, it is our artificial eucalyptus single stem. Place the stem so that your bottom leaf is at the end of the wrapped paper wire and tie the twine in the center, bottom and top of the greenery stem to attach it to the crown.
Keep Attaching!

Keep the twine knots outfacing. You'll be able to cover these with additional greenery and/or flowers. This also helps to ensure that the inside of the crown is flush with the wearer's head.
Do the same on the opposite side and then fill in the center.
Add Texture!

Following the same steps of attaching the base greenery, add in a textured, fluffier greenery! For this step, I used Italian ruscus and attached it in the same way - starting with the sides of the floral crown and filling in the center, using 3 pieces of twine for each greenery piece.
Start with Your Focal Flower!

When adding your flowers, I always start by adding the largest first. This 3" tea rose will be my focal flower so I add it off center. Since we set up a solid base of greenery, you can just hot glue the flower directly to that base.
Add More Flowers!

The number of flowers you use and the styles/colors are completely up to your personal preference! For this piece, I used one 3" tea rose as my focal flower, two 2.5" tea roses (so there were 3 tea roses total), five 1.5" lovelies dyed a soft pink, and five munchkins. Using flowers of different sizes helps bring more interest to your floral crown
Again, all were hot glued directly onto the greenery base and paper wrapped stems. You will want to be very careful where you are holding the crown when adding flowers so as to not burn your fingers when placing the flowers!
Add Your Final Fillers!

This is another section where you can be as extra extra as you would like! I was going for a somewhat more subdued look and added in bits of pink filler to fill in any gaps I saw. These were also glued directly onto the crown.
Finished Floral Crown!

The technique above can also be used if you want to make a collar for your favorite furry friend, a maternity sash and so many other things. The only difference would be the length of ribbon you leave hanging so it can be tied in place.
Happy crafting!
© 2026 Oh! You're Lovely - Sola Wood Flowers, All rights reserved. |
